Today I have looked into 123D Catch which Drew mentioned during my progress review. - http://www.123dapp.com/catch - http://www.digitaltutors.com/lesson/25346 -
A note the tutor says is to try to use around 40 images as when it goes into the 70s it tends to cause problems.
I had previously found a 360 view of the statue which I think they must have used this or a similar technique.
According to my schedule I should be very well on my way with my modeling, having it complete in 2.5 weeks.
Thursday 19 December 2013
Thursday 5 December 2013
More work on the ground floor
I have pieced together a few of the arches to see what they are like and have added the lights to it. I need to smooth the archways and still extrude them to make them like the actual building. I did a 'smooth' test and they arent exactly rounded, there are a few odd shapes so I need to fix that as well.


I have done a 360 look around the building and saw that one of the faces was gone, I must have deleted it while deleting another, not to worry though as that was easily fixed by 'filling the hole'. Also I noticed on the end colum there were extra lines that managed to find there way all over. Double clicking on the line isnt selecting the whole line so I have to click every single line, twice, before they actually delete so might take a bit of time to make sure I have captured all of them!

I tried to render the scene instead of doing a screen shot and this wonderful thing happened. The image plane image seems to have taken it upon itself to be a texture, how lovely :)

Think that calls for a bit of a break then try sorting the arches out a bit more.

Wednesday 4 December 2013
Top floor windows
For the top part of the building there are circle windows so I have been looking for a good tutorial that isnt using booleans.
I have managed to find one via creativecrash :
http://www.creativecrash.com/maya/tutorials/modeling/polygon/c/cutting-circular-holes-into-planar-meshes-while-maintaining-good-topology
The images I am also using to help get the detail for this are:


.jpg)
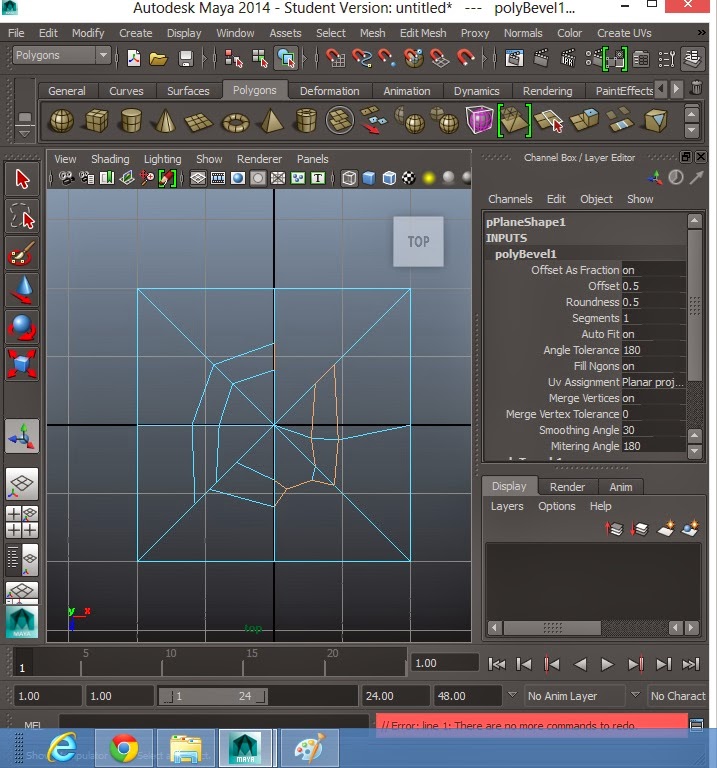
The tutorial shows the basic move in order to make the circle. To create the cuts I went into 'top' view and used the split tool. I then pressed 'enter' to set the lines in place.
I was on a roll with it until I pressed the wrong key, and now it wont go back to how it was so looks like I will be starting this over. I love how ever when following a tutorial things can still go squiffy.


I have managed to find one via creativecrash :
http://www.creativecrash.com/maya/tutorials/modeling/polygon/c/cutting-circular-holes-into-planar-meshes-while-maintaining-good-topology
The images I am also using to help get the detail for this are:


.jpg)
I was on a roll with it until I pressed the wrong key, and now it wont go back to how it was so looks like I will be starting this over. I love how ever when following a tutorial things can still go squiffy.


Well during my 5th attempt Maya closed! Might be a hint to move on to something else.
Monday 2 December 2013
Modeling the columns
Starting on the columns and arches for the ground level of the building.
I think a second monitor might come in handy here :/

I have a youtube video open on tips with making door way arches and columns, a few of my reference photos and the maya file. All on one screen is a little too messy and squished. Glad Christmas is coming up, fingers crossed I get some money and I can invest in a second screen.
While modeling the columns its had made me aware how bad quality the images are that I have. I have done a google search searching for images larger than 8MB. This has helped ALOT, so much more detail in images. I actually wasnt aware that I could a search like this until my friend told me.
So the images that will be helping me with the columns are below:


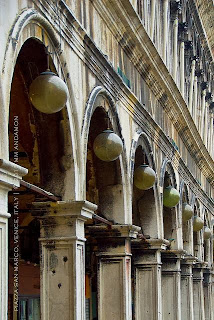
Can never have enough references I say. Especially when they help with the final product! The top two images have been chosen as they help big time with the bottom of the columns. I have quite a few already for the tops so I should be okay to continue with this.
Before coming across the more detailed image, I had started the shape, but now will need to delete the top part of this as there needs to be more edges.


Well it has taken three hours to get this much done, doesn't seem like a lot in that amount of time but it has taken time to click back and forward between the different ref images, the youtube video, my own work and other google searches to query certain things through out the modeling.
I think a second monitor might come in handy here :/

I have a youtube video open on tips with making door way arches and columns, a few of my reference photos and the maya file. All on one screen is a little too messy and squished. Glad Christmas is coming up, fingers crossed I get some money and I can invest in a second screen.
While modeling the columns its had made me aware how bad quality the images are that I have. I have done a google search searching for images larger than 8MB. This has helped ALOT, so much more detail in images. I actually wasnt aware that I could a search like this until my friend told me.
So the images that will be helping me with the columns are below:


Before coming across the more detailed image, I had started the shape, but now will need to delete the top part of this as there needs to be more edges.

To create this column I used a polygon cube, selected the bottom face and extruded out then moved downwards to create the shape. For the 4 front faces, I selected all of them, selected extrude and scaled them in and then extruded the centre in a little bit.


This is the bottom of the columns, I think I will ask Drew for some feedback in the next class, need to figure out the best way to get the curves on some of the layers. I would imagine adding vertexes and amending the current vertexes in order to get the desired shape but for now I am just going to get the basic blocked shape and then amend later if needed.
So, after finishing the top of the column, I took a render of the scene and guess what...when I pressed on the 'X' of the rendered image it decided to close Maya, and me thinking it was asking if I wanted to save the image i press 'do not save'...so yes, I now have to redo the top of the column!
I have spent about half an hour going through the different screens to line everything up and make sure they are the same size etc, I cant believe I have just closed the file :(

I have redone the top of the column but for some reason am not as happy with it as I was with the one I lost. This screen shot shows some amendments I made. For some reason even though I was selecting the whole object it was only scaling one half of the square, so I selected the appropriate vertex and amended those and used all four views to check they were in the right place. To size up things up I also moved the whole object to the centre of the grid and lining up the particular square at the bottom so I knew how wide to make the ones at the top.

The next challenge is the actual arch itself, the upper part of this column breaks into two arches - one to the right and one to the left. So, will be interesting doing that, I presume If I create two arches and then delete faces and join the arches together in the right places, hopefully that will work. Trial and error I guess.
For the arches the Youtube video I found is: http://www.youtube.com/watch?v=FmcTj1AwirY - It shows the basic archway.
Another issue I am going to face is rendering, when I downloaded Maya 2014 it only downloaded the program and not mental ray, so will either have to do all of my rendering in Uni or will have to keep searching for a way to get this to work. I am not too bothered at this stage as I don't need to start render tests for a few weeks, when I start applying textures and lights. While on about textures, with all of the references I have I might be able to recreate a lot of it in photoshop, but will worry more about that when the time comes.
Another thing I need to ask Drew (should probably make a list) is what is the best way to go about duplicates. With there being 100 windows, 50 port holes, 50 archways...that is a lot of duplicating going on.
Back to the archway. Following the tutorial I combined the meshes to make them one, I then removed the top face and selected the bridge tool (as seen in first image below). I then changed the divisions to 9.


Now I need to upload another image into the image plane to get the right shape for the archway, and continue with adding the light I made in a separate file. Also, in a few other images there seems to be material hanging from some of the arches so will look more into that once I have finished the basic shape of the building.
At the minute when I move the archway it all goes messy, in the tutorial it says to keep it like this until you are finished editing. Once I am happy with the archway I can freeze transformation and then delete by type, history. I am going to leave it for now though because I still want to ask about the curves on the columns.
scratch that, I have to do the above steps as it wont let me extrude to make the shapes I need. In addition to the ref images above I am using these to help with this stage aswell:


Top of the arches:

Bottom of the arches:

Time to take a break as both my back and eyes hurt!
Things to ask:
- Best way of duplicating
- How to add the curves to certain parts of the column (redoing it using curves or keep as is)
Things to look into:
- Downloading Mental Ray
- double archway
- connecting archways
Subscribe to:
Posts (Atom)